
About PHP Memory Limit
A PHP script’s memory limit determines how much memory or RAM it can consume. This prevents poorly written or buggy PHP scripts from taking up too many resources and crashing the server. In the case of a shared hosting environment where a single website crashing can affect many other websites on that server, this setting becomes even more essential.
When a PHP script consumes more memory than specified in the PHP Memory Limit in the PHP.ini file, the server will return a fatal error (usually a 500 ISE), indicating that the PHP memory limit has been exceeded. You can identify and resolve the issue by optimizing the code and increasing the memory limit.
How to Increase the PHP Memory Limit
The PHP memory limit can be increased in WordPress in several ways. Please follow the method that best suits you.
Using cPanel
Here are steps to increase the PHP memory limit using the cPanel:
- Log in to cPanel.

- Then click on the “MultiPHP INI Editor” button under the “Software” section.
- Now find the “Memory Limit” option and increase its value to the desired amount (e.g. 256M, 512M, etc.).
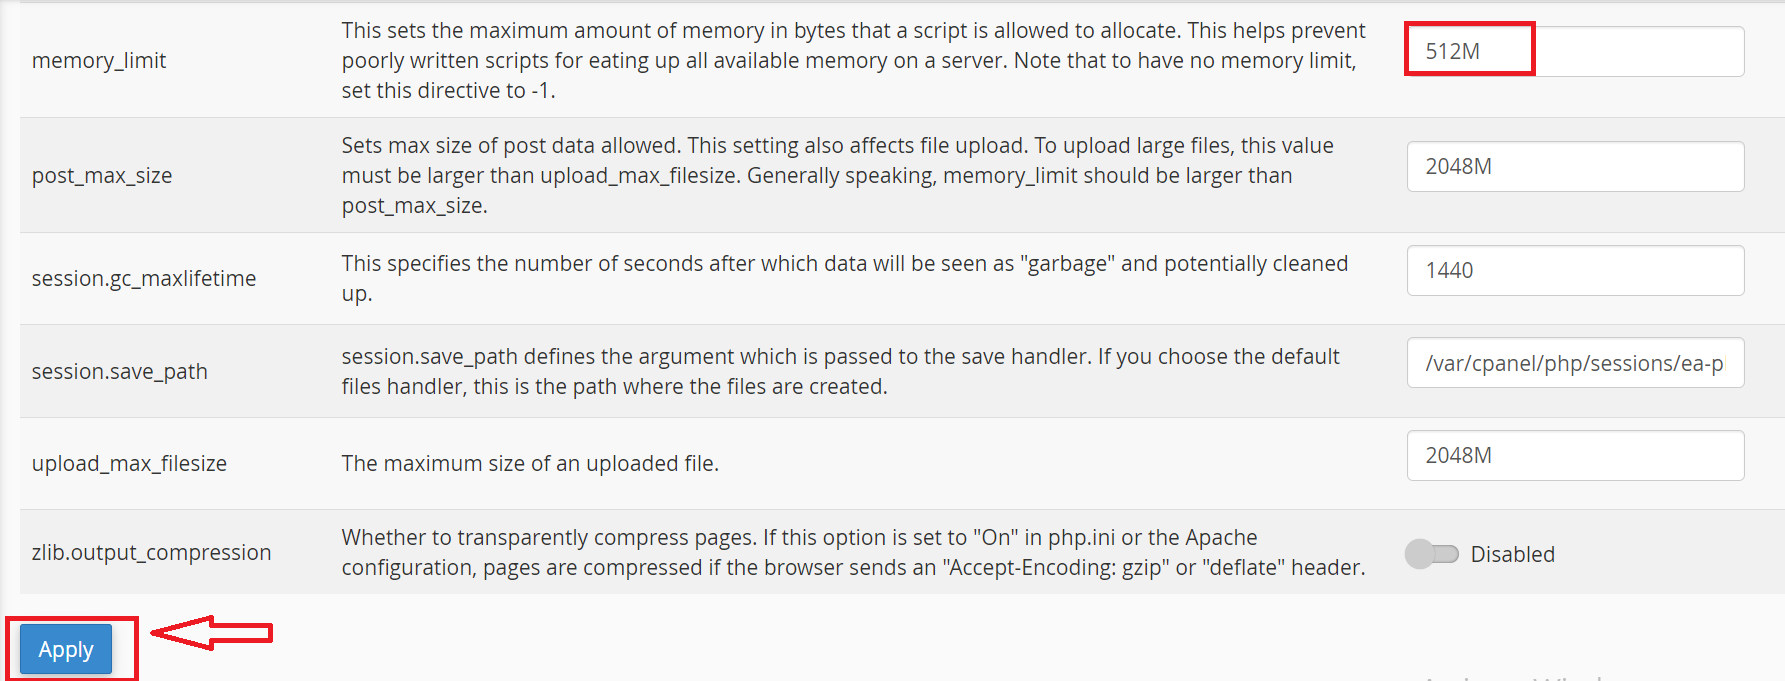
- Finally, click on the “Apply” button.
Using .htaccess and FTP Client
- Connect to your website using an FTP client like FileZilla client.
- Next, locate the .htaccess file in the root directory of your website.
- Now, download the .htaccess file to your local computer.
- Next, open the .htaccess file using a text editor.
- Here add the following line of code to the top of the file:
php_value memory_limit 256M
Please Replace “256M” with the desired memory limit.
- Now, save the changes to the .htaccess file.
- And finally, upload the modified .htaccess file back to your website.
Using .htaccess and cPanel’s File Manager
To increase the PHP memory limit using the .htaccess file through the file manager in cPanel, follow these steps:
- First, log in to your cPanel account.
- Now, locate and click the “File Manager” option in the “Files” section.

- Next, navigate to the root directory of your WordPress installation.
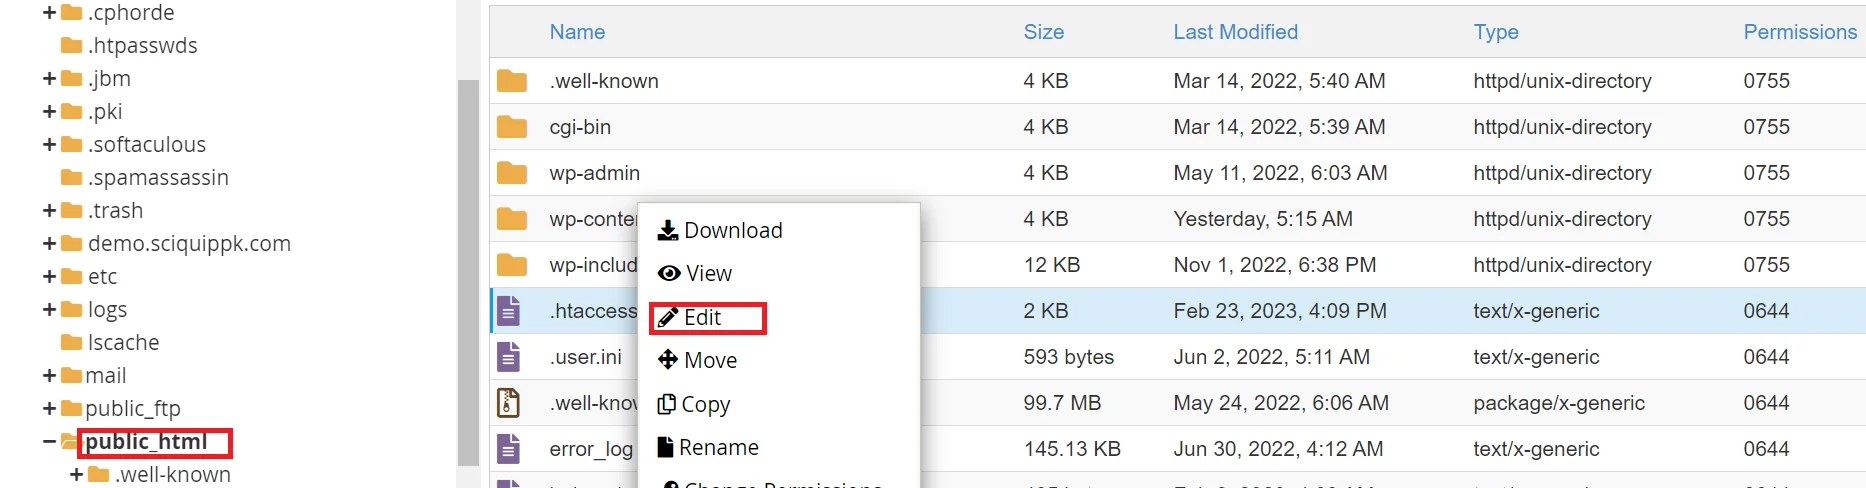
- Find the .htaccess file and right-click on it, then select “Code Edit”.
- And add the following line of code to the top of the .htaccess file:
php_value memory_limit 256M
Replace “256M” with the desired memory limit in MB. For example, if you want to set the limit to 512 MB, change the code to:
php_value memory_limit 512M
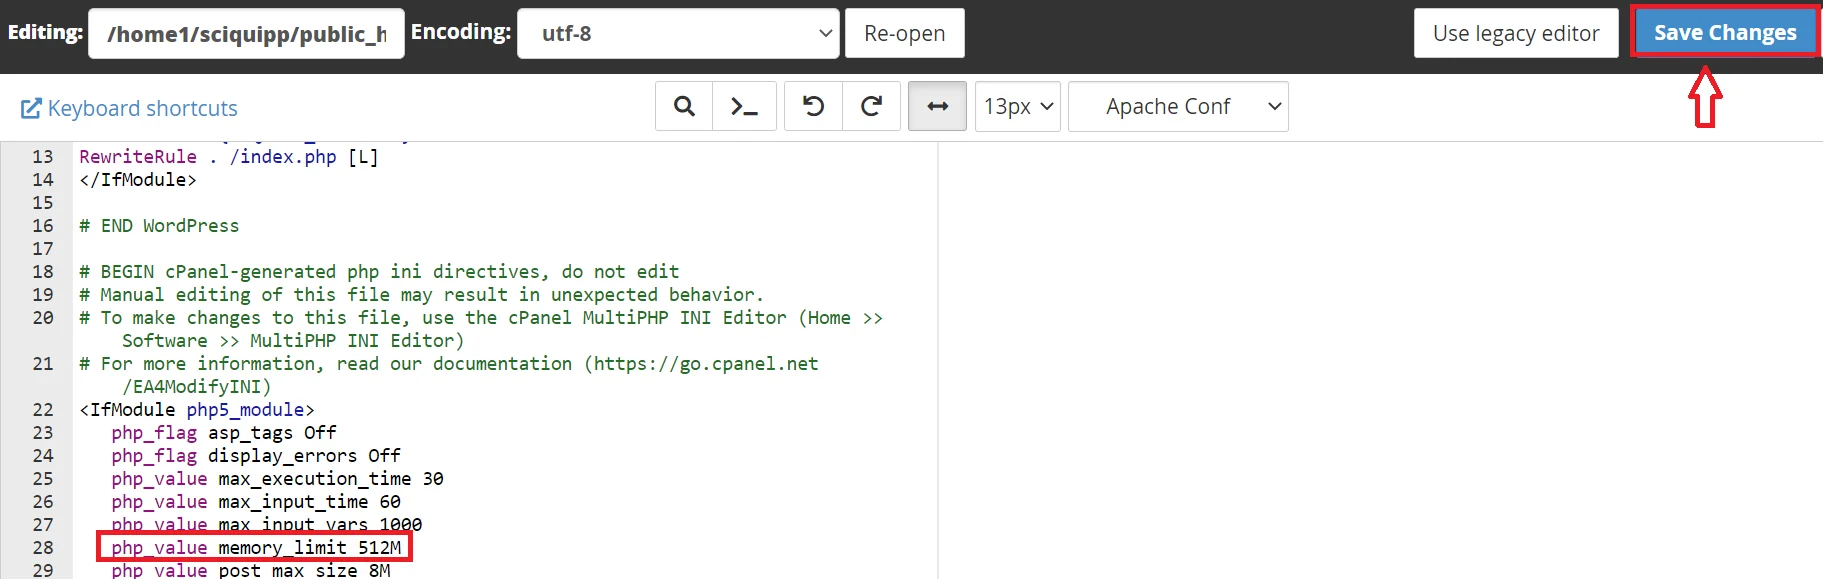
- Finally, save the changes to the .htaccess file by clicking “Save Changes”.
Refresh your website to see if the changes have taken effect.
Using WordPress
To increase the PHP memory limit in WordPress, you can use one of the following methods:
Editing the wp-config.php file:
- Log into your cPanel account.
- Next, go to File Manager and navigate to your WordPress root directory.

- Next, find and open the wp-config.php file.

- Now, add the following line of code to the file:
define('WP_MEMORY_LIMIT', '256M');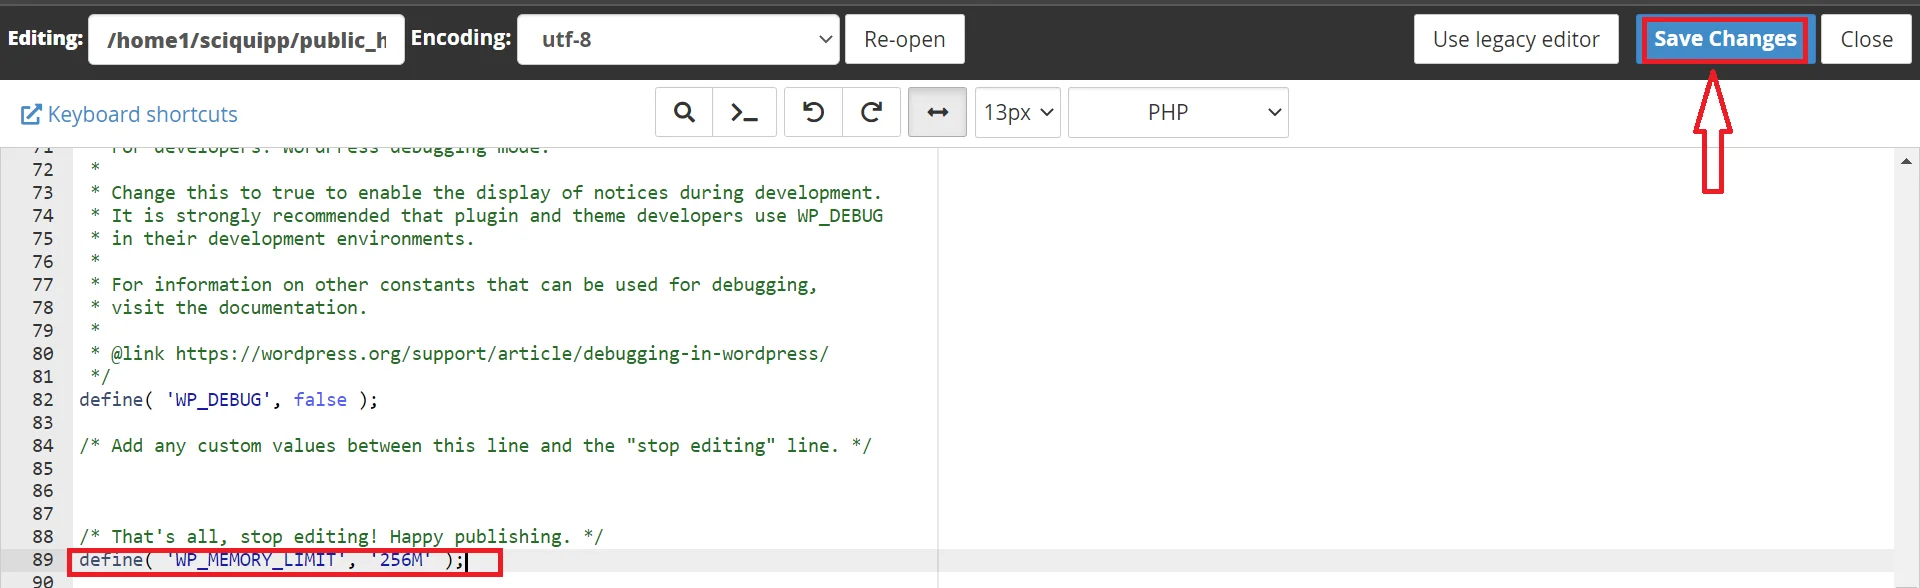
- Save the changes and close the file.
Using a plugin:
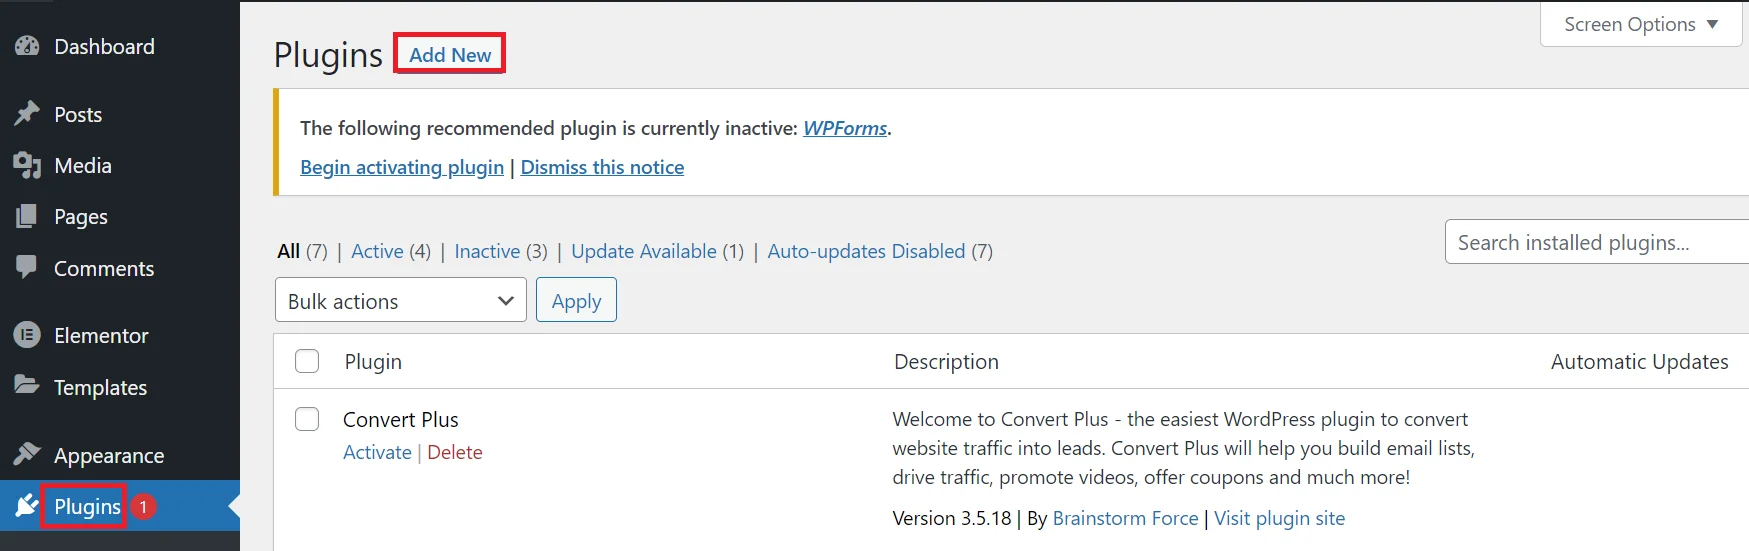
- Log into your WordPress dashboard.
- Then, go to Plugins > Add New.
- Search for “Increase PHP Memory Limit” and install the plugin.
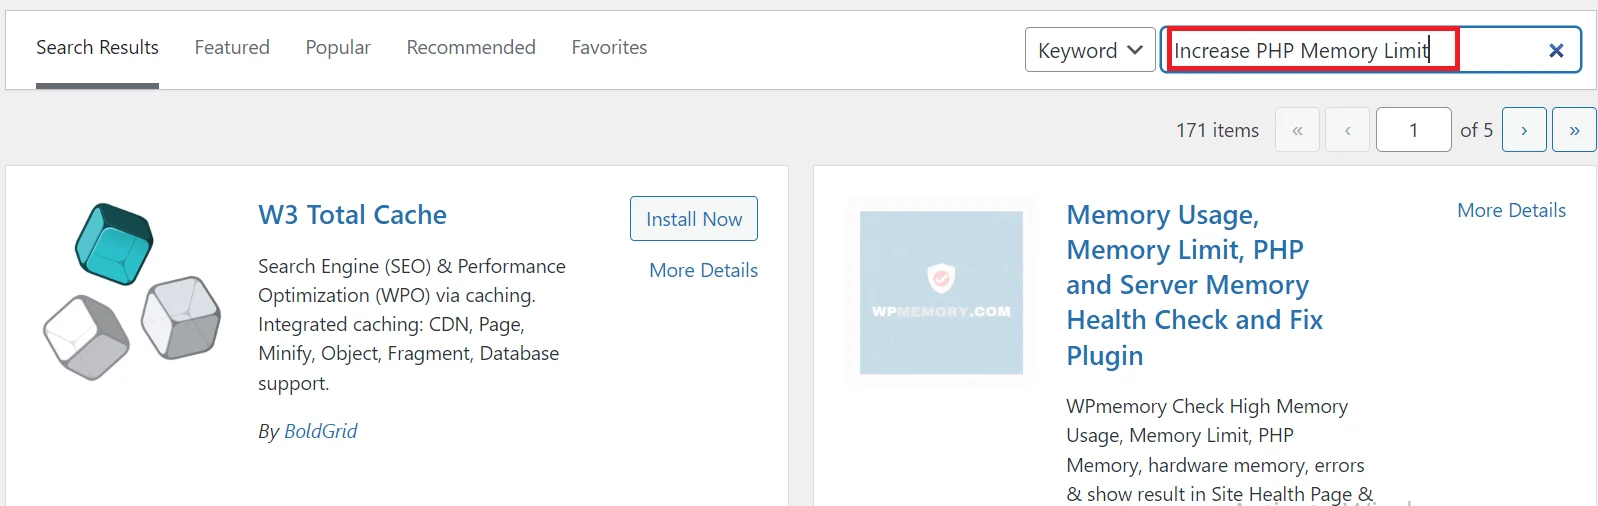
- Now activate the plugin.
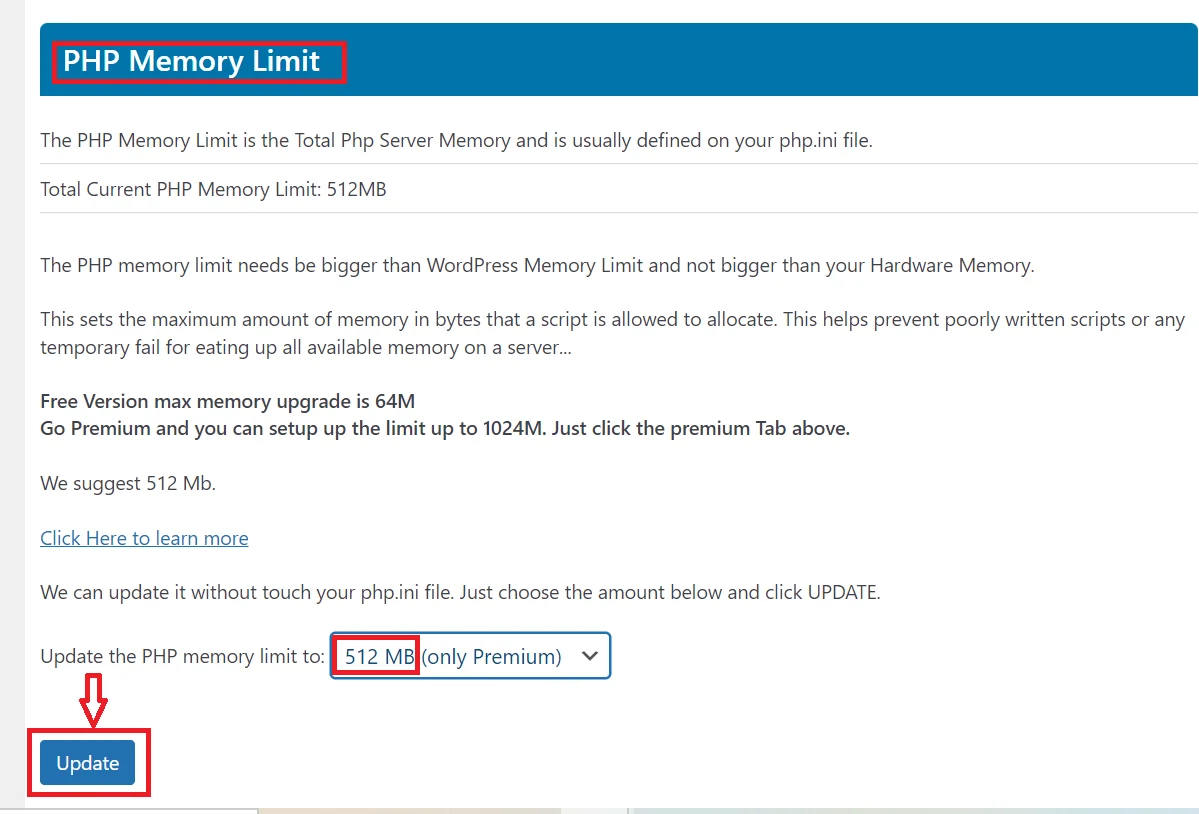
- Go to Settings > WP Memory Limit to increase the memory limit.
Note: Increasing the PHP memory limit too high can also cause problems, such as slowing down your site or causing errors. It’s recommended to keep the memory limit within the recommended range.