Mozilla Thunderbird is a free and open-source email client widely used to manage email accounts. This article will guide you through setting up your email account in Mozilla Thunderbird using both automatic and manual configuration options. Following these steps, you can quickly and easily send and receive emails through Thunderbird. This guide will also walk you through setting up your cPanel email account on Mozilla Thunderbird, ensuring a smooth and efficient email management experience.
Step-by-Step Guide to Configuring Your cPanel Email in Thunderbird
Step 1: Log in to Your cPanel Account
First, log in to your cPanel account to access your email settings. For a detailed guide, visit our knowledge base article: How do I log in to my intoHOST cPanel?
Step 2: Set Up a New Email Account
After logging in, the next step is to set up a new email account in cPanel. For instructions, refer to our article: How to Set Up a New Email Account Using cPanel. Remember to note the email settings provided by cPanel, as you'll need them for Thunderbird.
Step 3a: Automatic Configuration of Email Account in Thunderbird
-
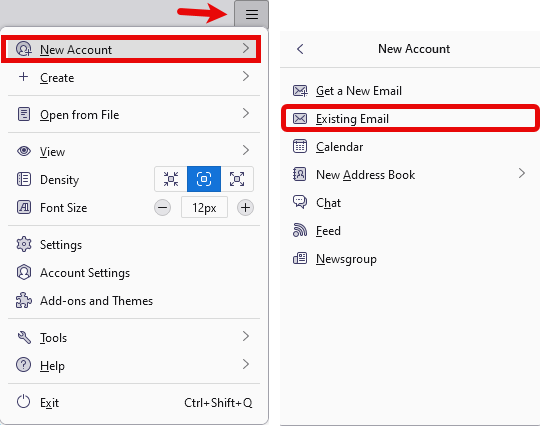
Access Account Setup: Click the 'Email' button under the 'Set up an account' section. Suppose you're already using Thunderbird with another account. In that case, you can add a new account by clicking on 'Local Folders' in the left sidebar and then selecting 'Email' under the 'Account Actions' dropdown menu.
-
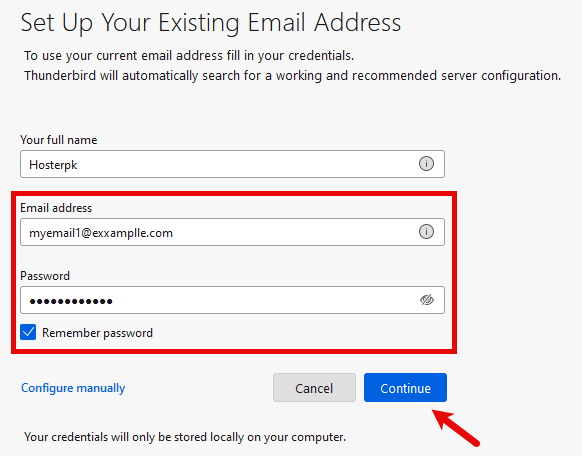
Enter Your Details: Enter your name, email address, and password in the provided fields. These details will be used to configure your email account automatically.
-
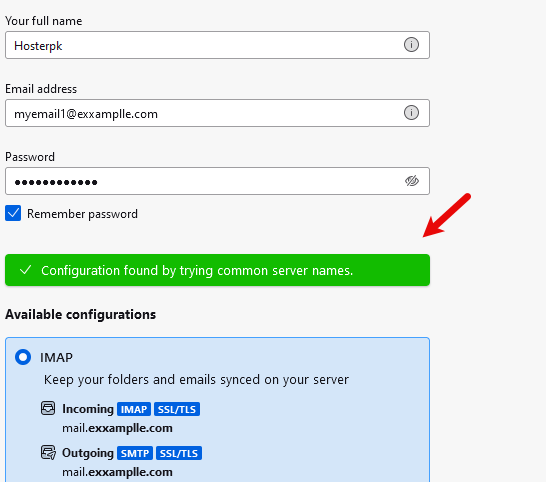
Automatic Configuration: Thunderbird will attempt to find the settings for your email account automatically. This process may take a few moments.
-
Complete Setup: Once Thunderbird has found your settings, click 'Done' to complete the setup.
Step 3b:Manual Configuration of Email Account in Thunderbird
If the automatic configuration does not work for your email account, you can manually configure Thunderbird by following these steps:
-
Access Manual Setup: If automatic configuration fails in the account setup window, click on 'Manual config' to enter your settings manually.
-
Enter Server Information: You will need to input the following information:
Type Incoming Server Outgoing Server SSL Port IMAP mail.yourdomain.com mail.yourdomain.com SSL/TLS 993 POP3 mail.yourdomain.com mail.yourdomain.com SSL/TLS 995 SMTP mail.yourdomain.com mail.yourdomain.com SSL/TLS 465 or 587 Always use IMAP with SSL for the best security and synchronization features.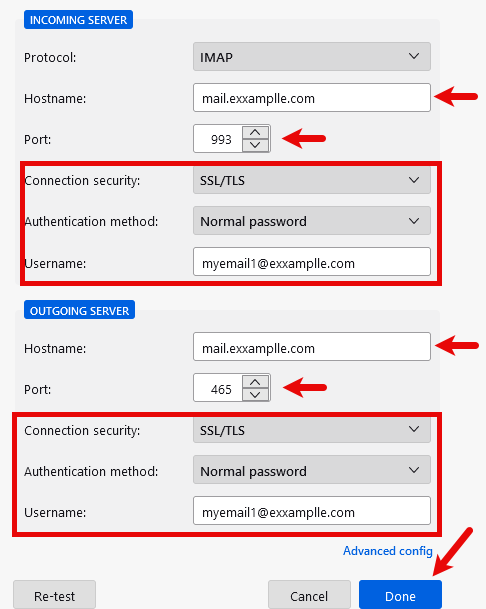
- Ensure "My outgoing server (SMTP) requires authentication" is checked.
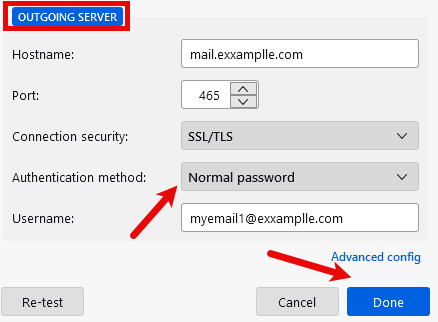
- Click Done to complete the setup.
-
Enter Your Credentials: Provide your full email address as the username and your email password.

-
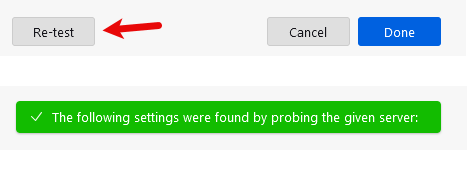
Testing Settings: Click on 'Test' to verify the correct settings. Thunderbird will attempt to log in to your email server with the provided details.
-
Complete Setup: Once all the settings are verified, click 'Done' to complete the manual setup.
Thunderbird Configuration for Synchronization, Storage, and Archiving
Mozilla Thunderbird offers robust email synchronization, storage, and archiving features and flexibility in managing emails, contacts, and calendar events.
Configuring Email Synchronization
Email synchronization allows you to access your emails from multiple devices, keeping your inbox updated across platforms.
-
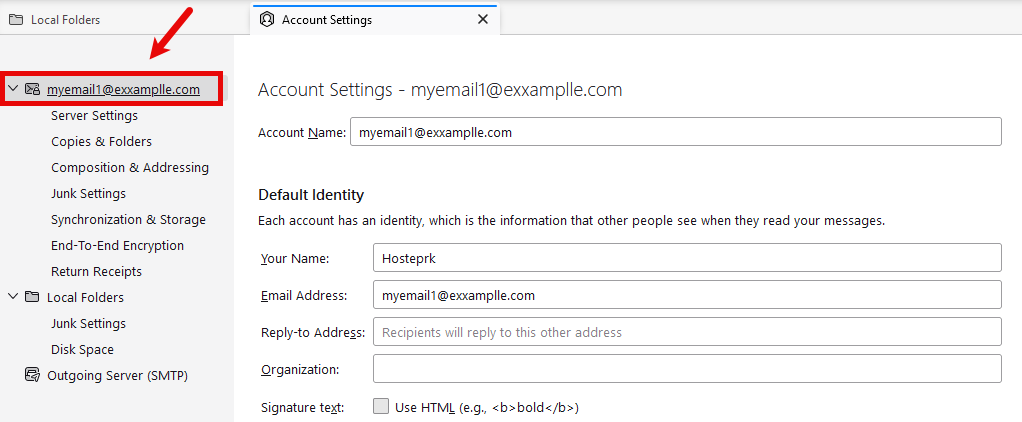
Open Thunderbird and navigate to Account Settings.
-
Select your email account and click on Server Settings.
-
Under Server Settings, ensure that the 'Check for new messages at startup' and 'Check for new messages every X minutes' options are checked. This ensures Thunderbird regularly syncs your email.
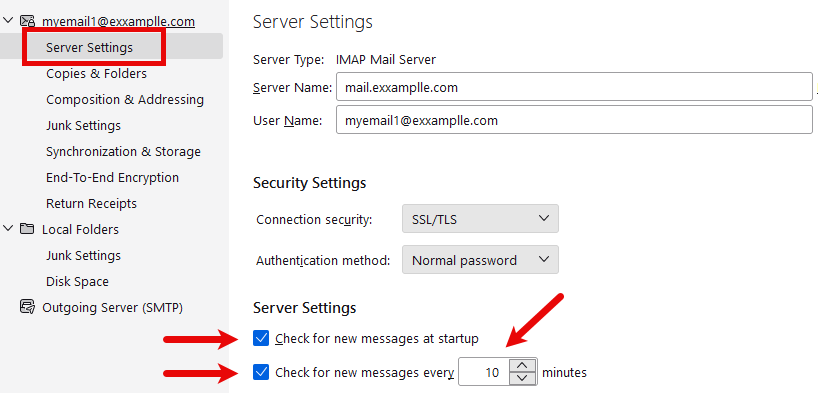 Adjust the frequency of email checks according to your preference. However, a shorter interval ensures more timely updates.
Managing Email Storage
Thunderbird stores emails locally, allowing you to access your messages even when offline. To manage storage:
-
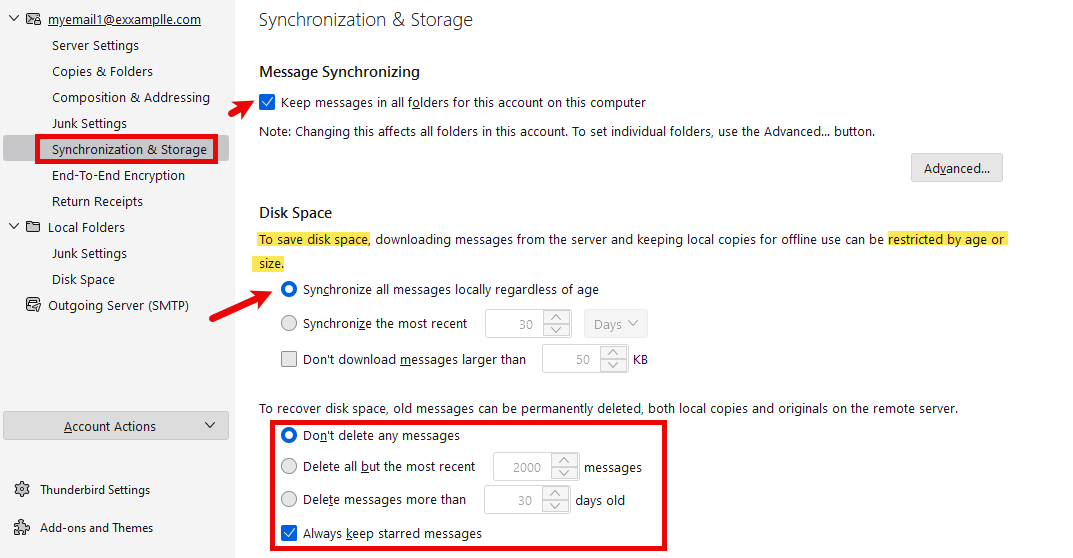
In Account Settings, go to Synchronization & Storage.
-
Here, you can configure how Thunderbird downloads and stores messages. For instance, you can keep all messages locally or only keep recent ones to save space.
If you have limited disk space, consider customizing these settings to prevent storage issues.
Setting Up Email Archiving
Archiving emails can help you organize your inbox by moving old or unneeded emails to an archive folder instead of deleting them.
-
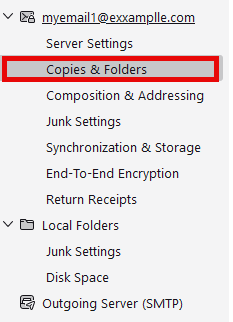
In the Account Settings, find the Copies & Folders section.
-
Look for the Archiving option and choose how to archive your emails. You can archive by year, month, or a custom period.
 Archiving emails correctly will help keep your inbox clean and manageable.
Additional Tips
- Regularly clean up your inbox and archive to maintain efficiency.
- Use Thunderbird’s built-in search and filter functions to find and organize emails quickly.
- Explore Thunderbird add-ons for enhanced functionality like better search tools or email scheduling.
- Thunderbird Profiles: Profiles store your emails, settings, and personal information. They are crucial for backup and migration purposes.
- Tagging: Thunderbird allows you to tag emails for easy organization and retrieval. Use tags to prioritize and categorize your emails effectively.
- You can also use 'Filters' to organize your messages.
Troubleshooting Common Issues
Here are some tips for not sending messages using Mozilla Thunderbird.
Port Blocking: If you cannot send emails, your ISP might be blocking port 25. Try switching to port 587 or 465. Ensure "My outgoing server (SMTP) requires authentication" is enabled to avoid outgoing mail issues.
If you encounter any issues during setup or have further questions, please open a support ticket here or initiate a LiveChat session using the icon at the bottom right of your screen. For professional email solutions, visit our email hosting page.
Following this guide, you can set up your cPanel email account in Mozilla Thunderbird efficiently, ensuring a smooth email management experience.
