Setting up a new email account in cPanel is a straightforward process that can significantly enhance professional communication. This article will guide you through the steps to create a new email account through the cPanel interface provided by intoHOST.
Step 1: Accessing cPanel
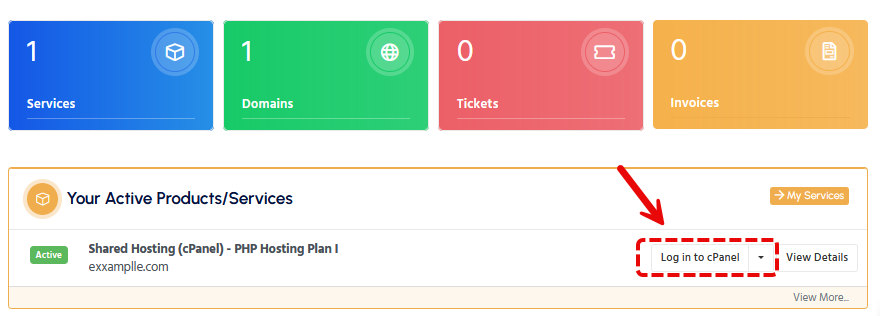
First, log in to your cPanel account. You can access cPanel via intoHOST's client area at intoHOST Client Area. Enter your credentials to log in.

Step 2: Navigating to Email Accounts
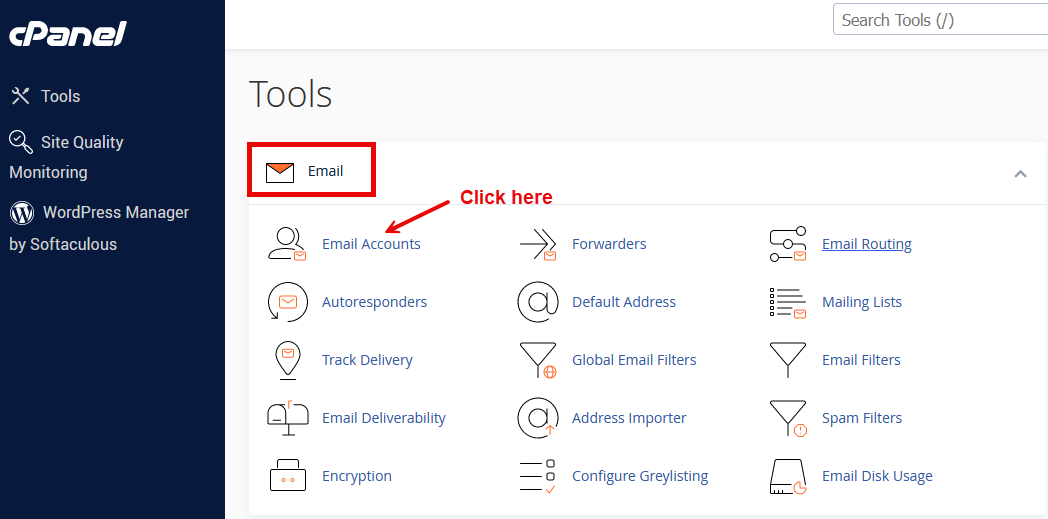
Once logged in, locate your service and click the 'Login to cPanel' button. Once logged in, locate the Email section and click on Email Accounts. This area allows you to manage all email-related settings.

Step 3: Create a New Email Account
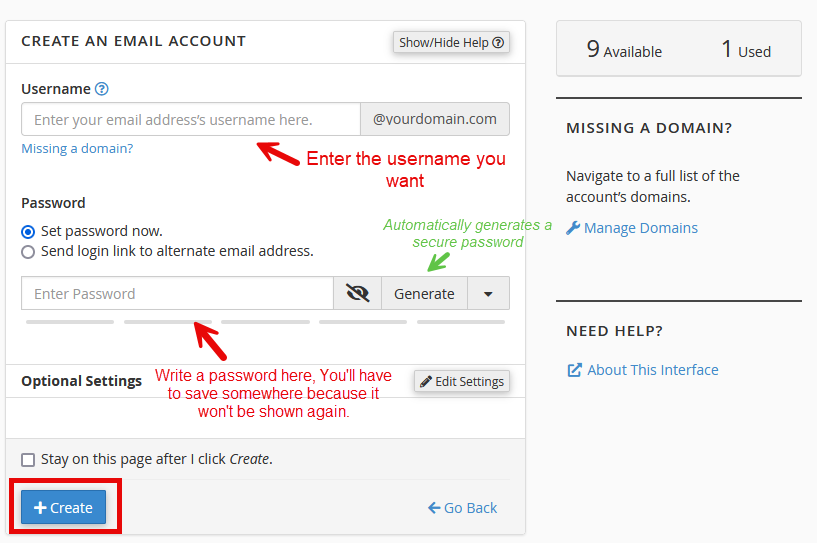
In the Email Accounts section, click on the +Create button. Here, you will enter the details for your new email account:

- Email: Choose your desired email address (e.g., [email protected]).
- Password: Create a strong, unique password for this account.
- Mailbox Quota: Set the storage limit for your email account.

Note: It's important to use a strong password to ensure the security of your email account.
Step 4: Save and Confirm
After filling in the details, click on the Create button. Your new email account will now be set up and ready to use!
Professional Email Solutions
Remember, using your domain name and a professional email address can significantly boost your business's credibility. For advanced email hosting solutions, visit our Professional Email Service.
Conclusion
You have successfully set up a new email account using cPanel. This email account can be used for business communications, website notifications, or other professional correspondence.
"A professional email address using your domain enhances business credibility and communication efficiency."
If you encounter any issues, please open a support ticket here or a LiveChat session using the icon located at the bottom right of the screen.
