
Setting up your email on an Android phone is a straightforward process. In this article, we'll guide you through the steps to configure your email using the default mail client on an Android device, such as a Samsung phone. This guide is based on the latest version of Android to ensure compatibility and ease of use.
Step 1: Create Your Email Account in cPanel
You need an active email account before you can set up your email on your Android phone. If you haven't already created an email account, follow these simple steps:
- Visit the WHMCS clientarea at intoHOST Clientarea.
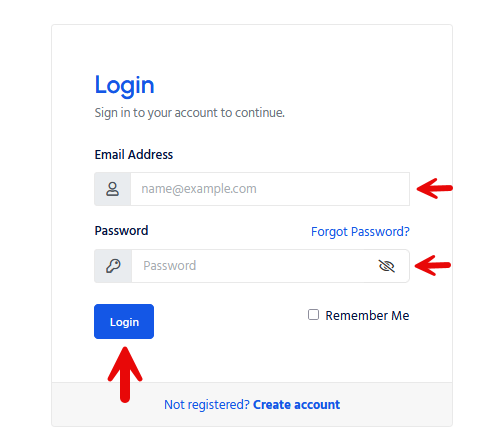
- Log in with your credentials.
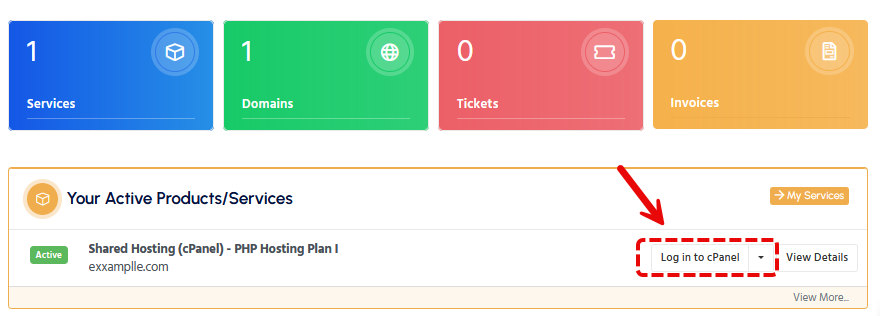
- Once logged in, click on the 'Login to cPanel' option.
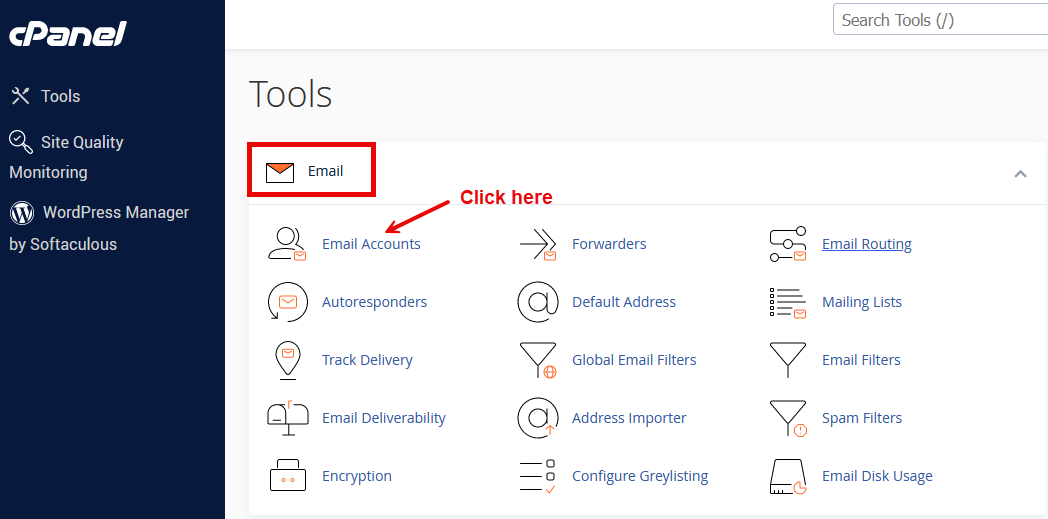
- In cPanel, navigate to the Email section and click 'Email Accounts'.
For a detailed guide on creating a new email account, refer to our knowledge base article: How to Set Up a New Email Account Using cPanel.
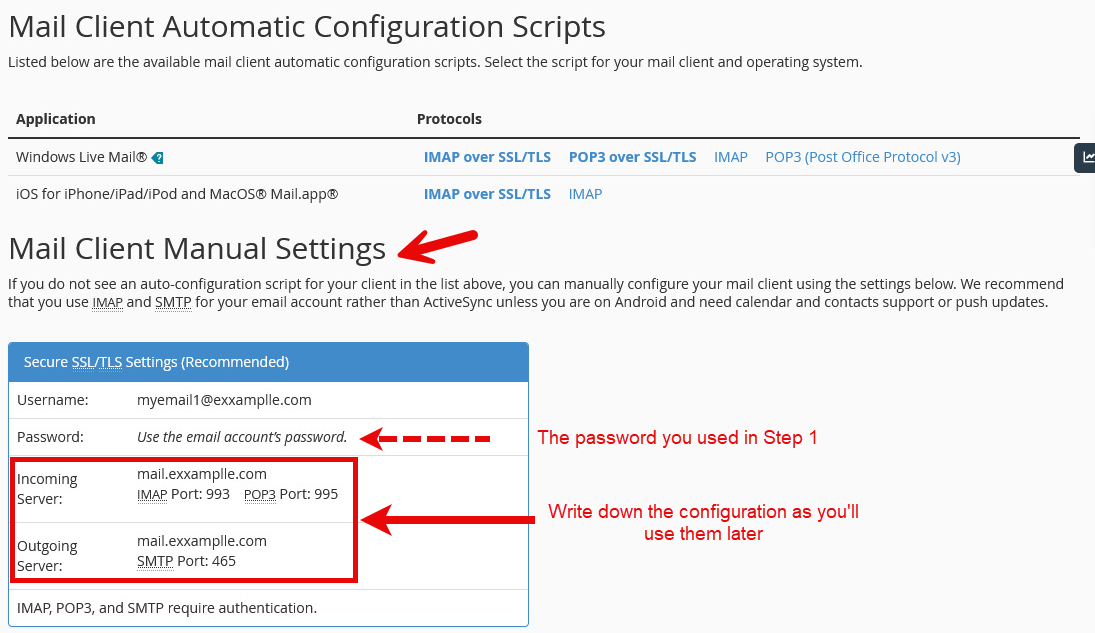
Step 2: Accessing Email Configuration Details
After creating your email account in cPanel:
- Go back to the Email Accounts section.
- Find your newly created email account and click on 'Connect Devices'.
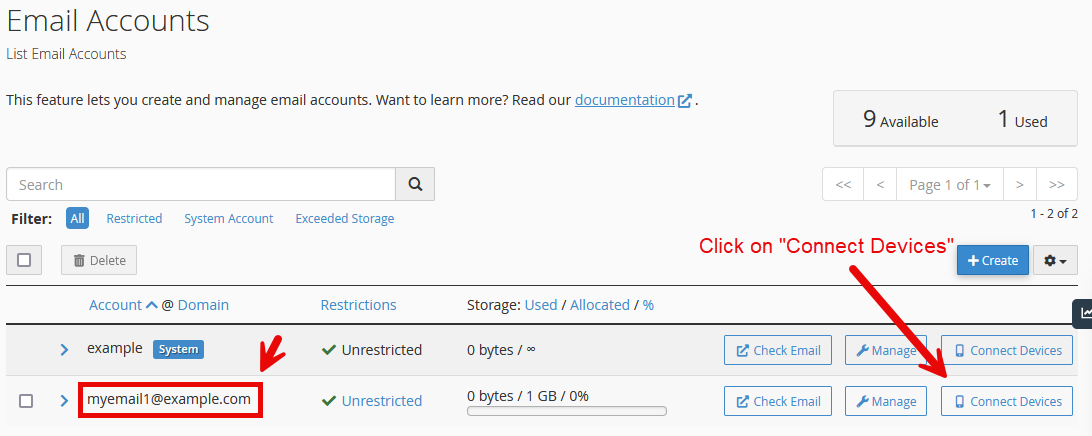
- Here, you will find the necessary IMAP/POP3 and SMTP settings that you'll need for your Android phone.
Step 3: Setting Up Email on Your Android Phone
With your email account ready and settings in hand, let's set up your email on the Android device:
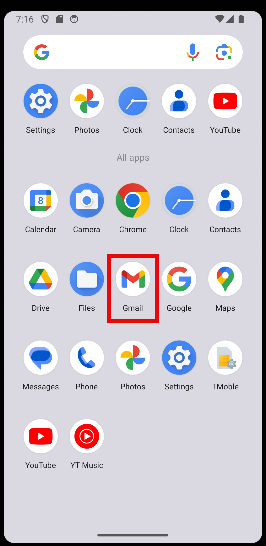
1. Locate the Default Email App:
First, find the default email client on your Android phone. It's typically labeled as 'Email' or 'Mail' and can be found in your app drawer. Or you can go to 'Settings' and then 'Add Account'. Choose 'Other' as the account type.

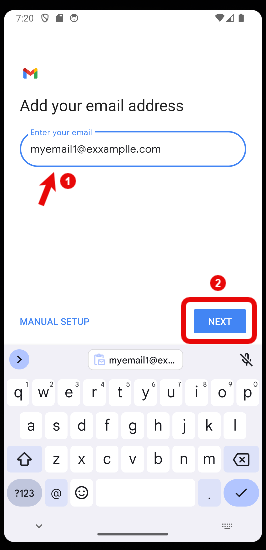
3. Enter Your Email Address:
Type in your full email address and tap 'Next'.
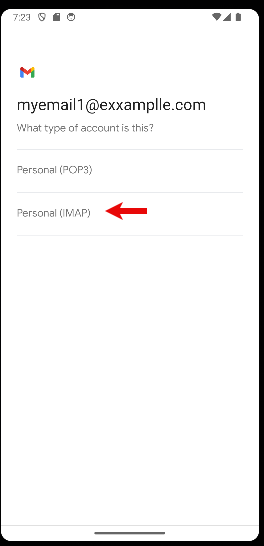
4. Select Account Type:
Choose the type of email account you are setting up. Most users will select 'IMAP' for its flexibility and synchronization features.
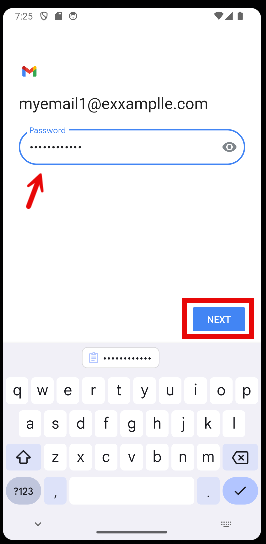
5. Enter Account Details:
Input your password and other required details. Your incoming and outgoing server settings will usually be configured automatically. If not, you'll need to enter them manually. You can find these details in our knowledge base article on setting up a new email account using cPanel.
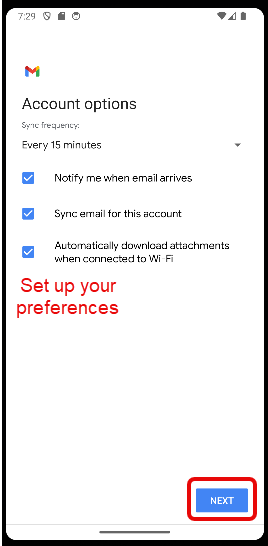
6. Finalize Settings:
You may be prompted to set up additional preferences, such as account sync frequency and notifications. Customize these based on your preference.

7. Complete the Setup:
Once everything is entered, your phone will verify the settings and complete the setup process if everything is correct. Here is a summary of the setup so far:
- Open the default mail client on your Android phone.
- Go to 'Settings' and then 'Add Account'.
- Choose 'Other' as the account type.
- Enter your email address and password created via cPanel.
- Select 'Manual Setup' and choose between IMAP or POP3.
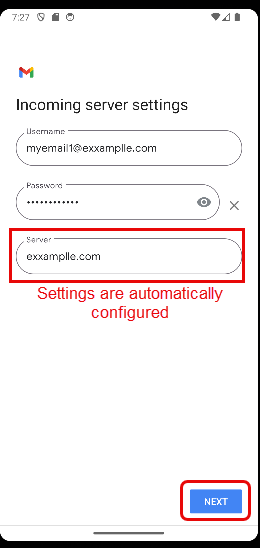
- Enter the incoming server settings (IMAP/POP3) that you noted earlier from cPanel.
- Proceed to enter the outgoing server settings (SMTP).
IMAP syncs your email with the server, while POP3 downloads emails locally. Choose based on your preference.
- Once all details are entered, your phone will verify the settings.
- After successful verification, your email account is set up and ready to use!
Image Request: A generic Android phone displaying adding a new email account in the default mail client.
Additional Configuration Options
Once you have set up your email on the Android device, based on the Android client, you can set up the following configuration options:
- Signature: You can add a custom signature to your emails.
-
Sync Settings: You can also configure sync settings for your email account, e.g., how often to sync emails (15 min, 30 min, hourly, etc.)., such as the frequency of email synchronization and what types of data (e.g., emails, contacts, calendar) to sync.
-
Notification and Account Preferences: Customize how you receive notifications for new emails and set up various account preferences.
-
Security and Authentication: For certain account types, you may have options for additional security measures like two-step verification.
Troubleshooting and Support
Setting up email on an Android device is generally straightforward, but if you encounter any issues, please open a support ticket here or start a LiveChat session using the icon at the bottom right of the screen.
Professional Email Services
Are you looking for more than just a basic email setup? Consider our professional email services for enhanced features and reliability. Check out our offerings here.
In Conclusion:
Setting up your email account on an Android phone like Samsung using cPanel is a seamless process that enhances your email management capabilities. By following these simple steps, you can ensure that your emails are always within reach, no matter where you are.
Remember, at intoHOST, we are always here to help you with your hosting and email needs. Happy emailing