
Migrating your emails from Gmail to a cPanel email account can initially seem daunting, but it's a smooth process with the right steps. This guide will walk you through the procedure, ensuring you don't miss out on any important emails during the transition. Remember, if you're looking for a professional email service, our email hosting solutions offer robust features tailored for businesses of all sizes.
Pre-Migration Checklist
Before diving into the migration process, let's ensure you have everything set up for a successful transition.
-
Email Client Installation: Install an email client like Mozilla Thunderbird or Microsoft Outlook. This will serve as the intermediary for transferring your emails.
-
Backup Your Data: Use tools like Google Takeout to back up your Gmail data, including emails, contacts, and calendars.
-
Know Your Server Details: Familiarize yourself with your IMAP and SMTP server details from your cPanel dashboard under the Email Accounts section.
-
Stable Internet Connection: A strong, stable internet connection is vital, as the migration process can be bandwidth-intensive.
- Domain Access: Ensure access to your domain's DNS settings for updating MX records and other DNS entries.
Step 1: Create Your cPanel Email Account
Before you can migrate your emails, you must have an active cPanel email account. If you haven't set one up yet, please refer to our guide on how to set up a new email account using cPanel. Confirm your active cPanel email account for each Gmail account you're migrating. This step is essential to ensure a place for your emails to land.
Step 2: Prepare Gmail for Migration
Before you start the migration process, ensure that IMAP is enabled in your Gmail account. This will allow you to access your Gmail messages through other email clients, which is necessary for the migration.
- Log into your Gmail account.
- Go to Settings (gear icon) > See all settings.
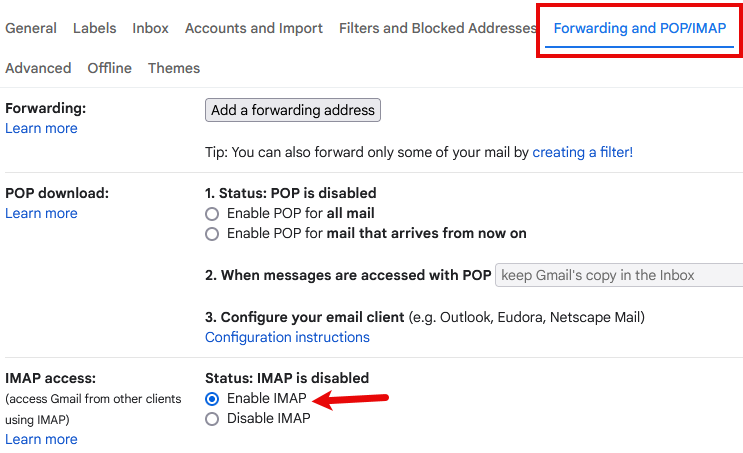
- Click on the "Forwarding and POP/IMAP" tab.
- In the "IMAP access" section, select "Enable IMAP".
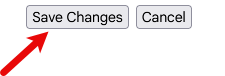
- Save your changes.
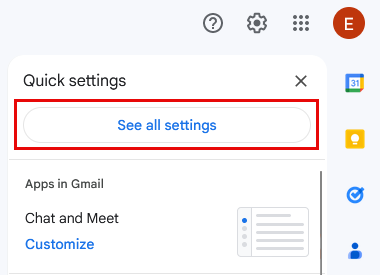
Success! IMAP Enabled in Gmail: Check your Gmail settings to ensure IMAP is enabled. This allows you to access Gmail messages through another email client, facilitating the migration.
Step 3: Import Your Emails and Contacts from Gmail to cPanel
Use a desktop email client like Outlook or Thunderbird to assist with the migration. First, configure the client to access your Gmail and cPanel email accounts. Guides for setting up cPanel email on Outlook and Thunderbird are available.
- Configure the Email Client with Gmail:
- Install and open your chosen email client.
- Add your Gmail account using the IMAP protocol. You will need your Gmail email address and password.
- The client will download your Gmail messages.
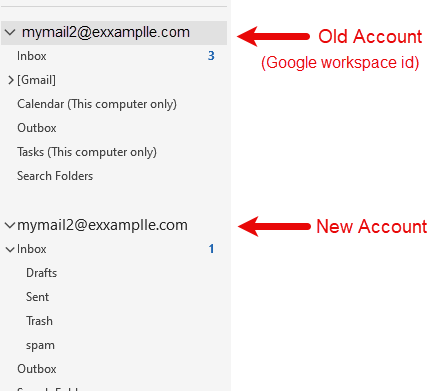
- Add Your cPanel Email Account:
- Add a new account in the email client for your cPanel email address using IMAP.
- You will need your cPanel email address, password, and the IMAP server settings from cPanel (usually something like mail.yourdomain.com).
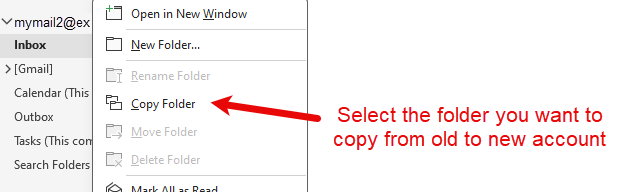
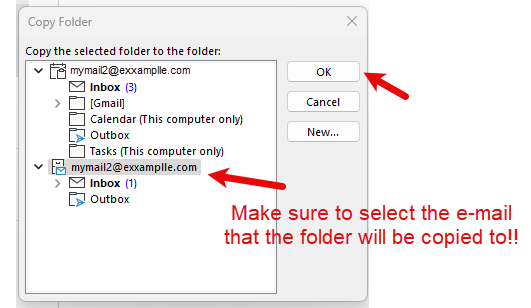
- Transfer Emails:
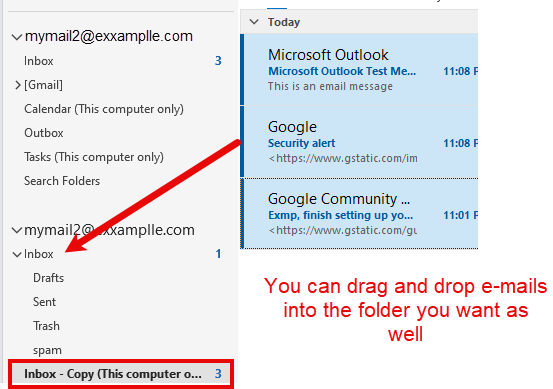
- Once both accounts are set up in the email client, you can drag and drop emails from the Gmail account to the cPanel account within the client.
- This process may take some time, depending on the number of emails.

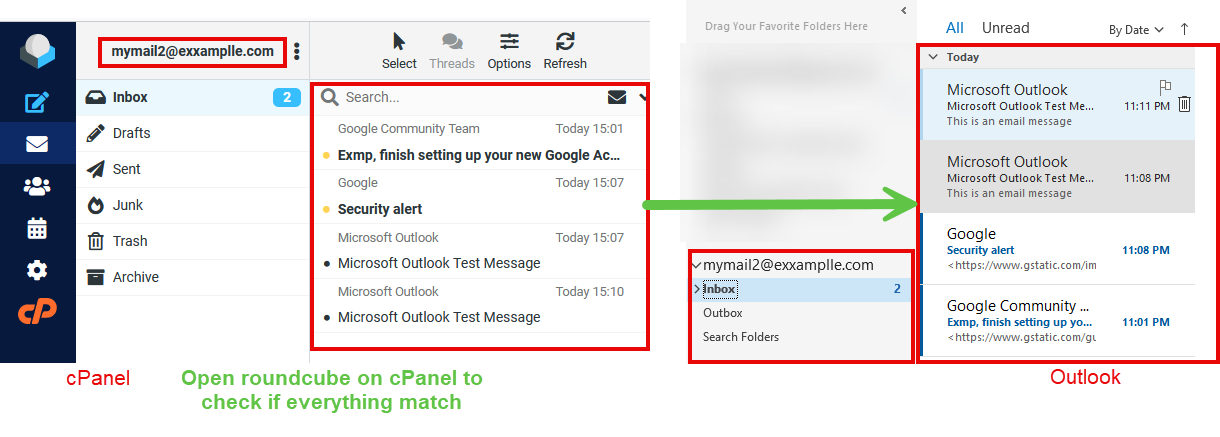
Step 4: Verify Email Migration
After the migration process, log into your cPanel email account through webmail or the same email client to verify that all emails have been successfully migrated.
Step 5: Update MX Records
If you are switching from using Gmail for your domain's email to using cPanel, you must update your domain's MX records to point to your cPanel hosting. This is usually done through your domain registrar or the DNS settings in your cPanel account. Your cPanel hosting provider will provide the MX records you need.
Final Steps
After completing the migration, send a test email to your cPanel account and reply to ensure everything works correctly. Monitor both your Gmail and cPanel inboxes for any signs of missed emails.
If you encounter any issues during this process, please open a support ticket here or initiate a LiveChat session using the icon at the bottom right of the screen. Our team is ready to assist you with any challenges or questions.
Transitioning your email services is a significant step towards having more control over your digital communication. By following these steps, you can ensure a seamless migration from Gmail to your cPanel email account, backed by the professional support of our team at intoHOST.